Flowyte Setup Guide
Follow this comprehensive guide to set up and configure your Flowyte visual call routing system for RingCentral
Flowyte User Guide
Welcome to Flowyte! This step-by-step guide will walk you through setting up and configuring your visual call routing system for RingCentral.
1. Sign Up and Account Creation
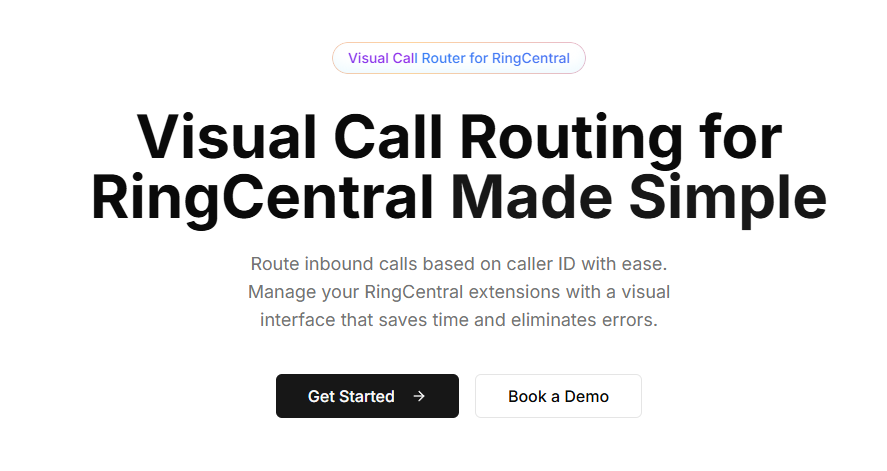
1.1 Visit the Flowyte Website
Navigate to flowyte.com and locate the "Sign Up" or "Get Started" link.
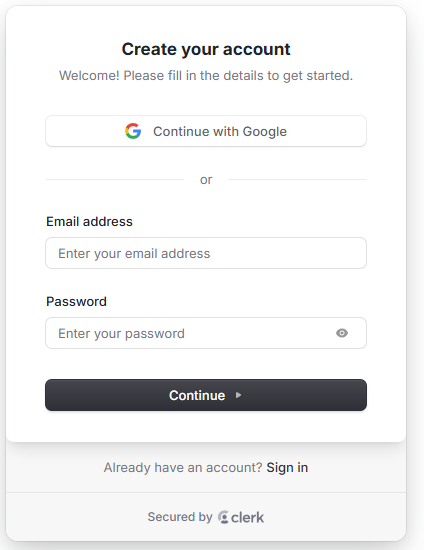
1.2 Choose Your Sign-Up Method
Select your preferred sign-up method:
- Email and password
- Google account
- Microsoft account
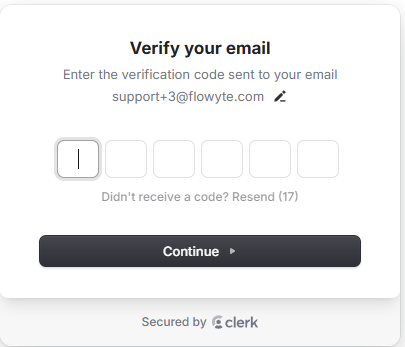
1.3 Account Verification
If needed, verify your account via the email sent to your inbox.
1.4 Welcome to Flowyte
After verification, you'll be redirected to your Flowyte dashboard.
2. Connecting to RingCentral
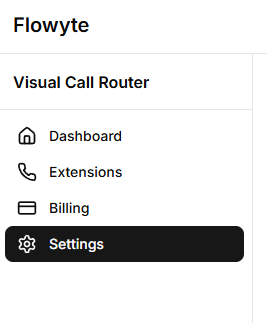
2.1 Navigate to Settings
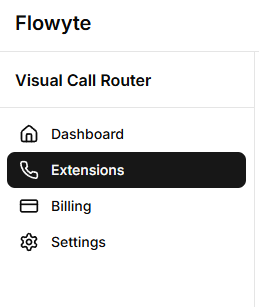
From your dashboard, click on "Settings" in the sidebar navigation.
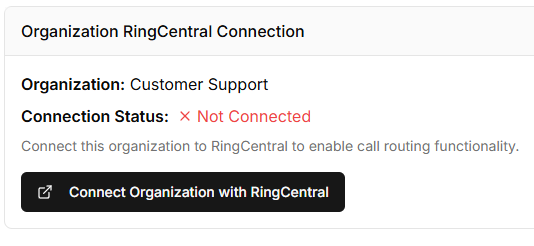
2.2 Find RingCentral Connection Section
Scroll to the "Organization RingCentral Connection" section.
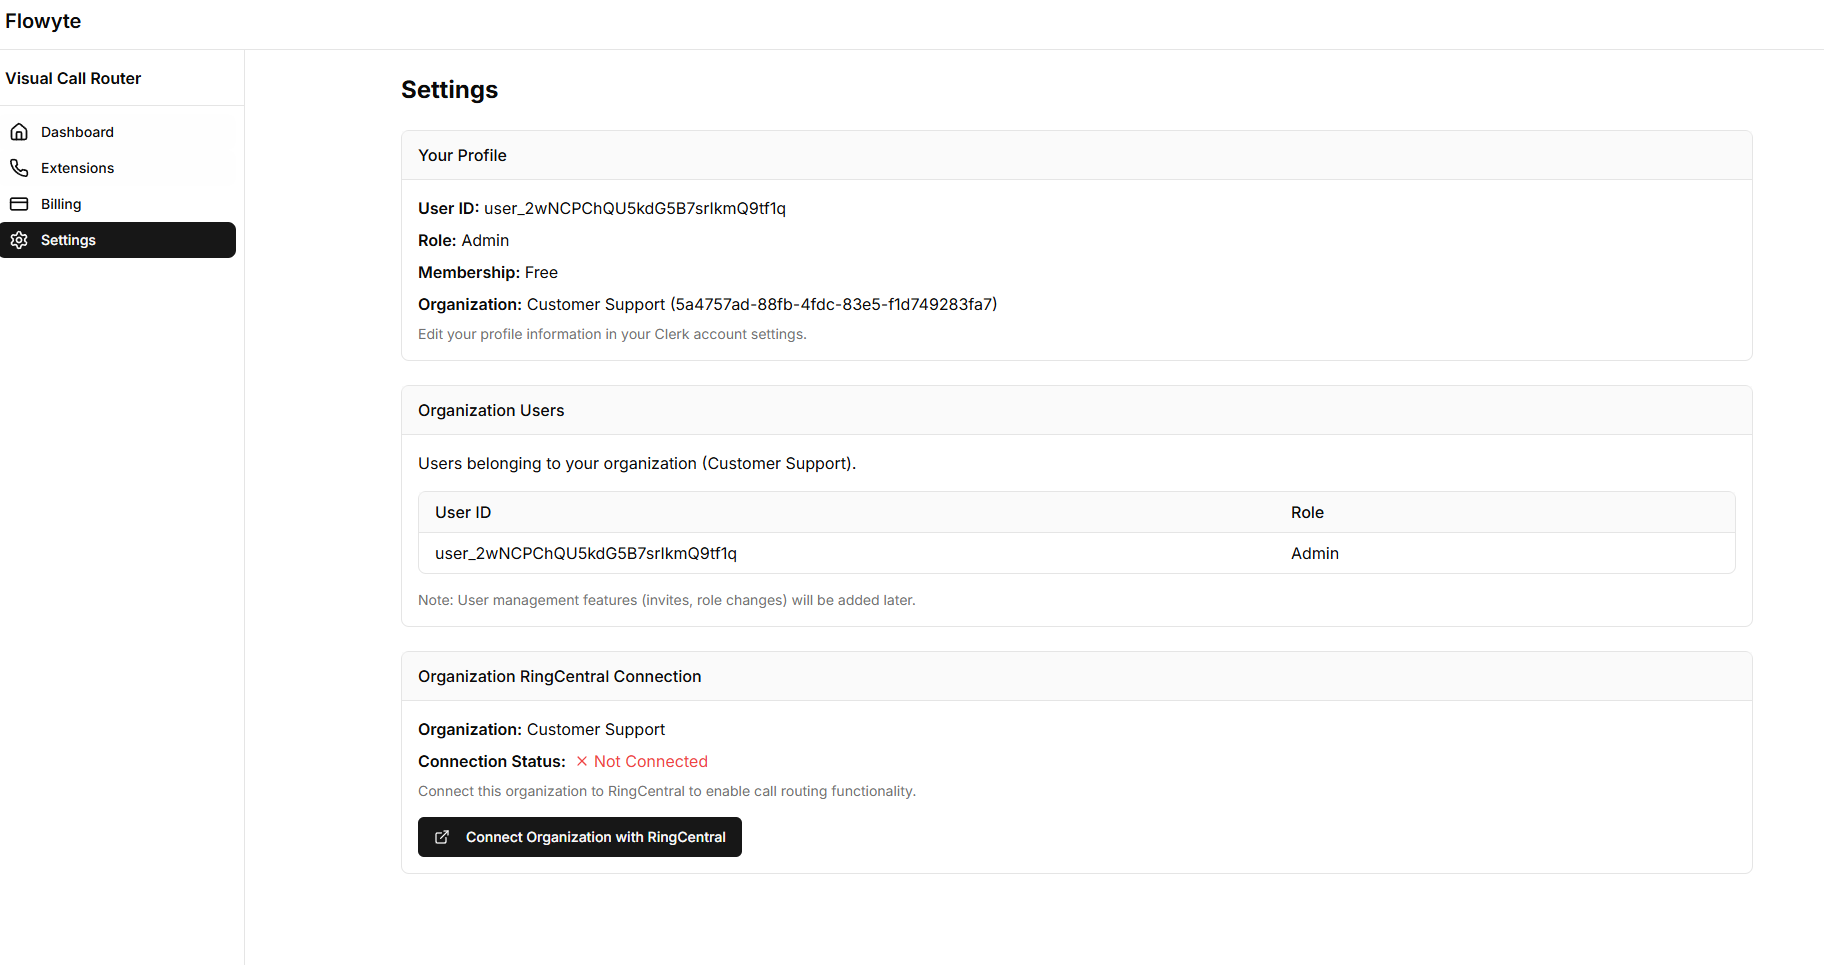
2.3 Connect RingCentral Account
Click on "Connect Organization with RingCentral" button.
2.4 Super Admin Notice
Read the important authentication notice about using your RingCentral Super Admin account. This is very important to make sure the Super Admin with the (Super Admin) tag in the RingCentral account makes this authentication request. Failure to use the correct user will result in failed redirection of calls.

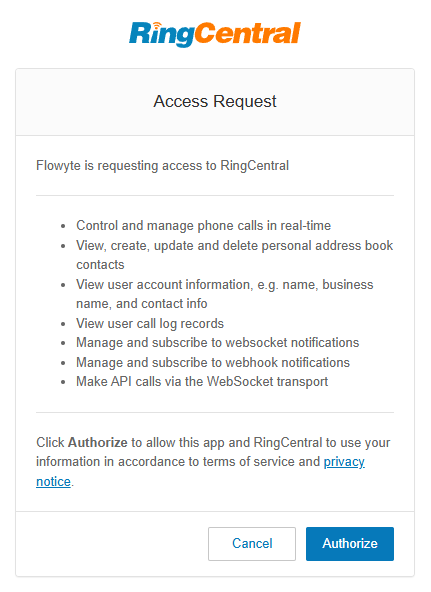
2.5 Authorize Flowyte
You'll be redirected to RingCentral's authorization page. Login with your RingCentral credentials and authorize Flowyte to access your account.
2.6 Verify Connection
Once connected, you'll see a confirmation message and your RingCentral connection details.
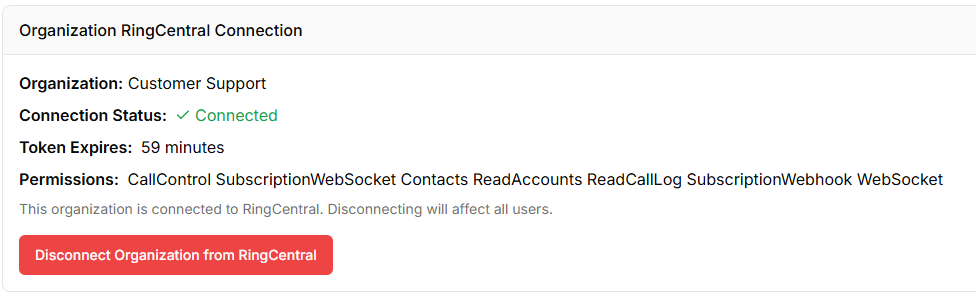
At any point, if you wish to revoke Flowyte access to RingCentral, you may do so with the disconnect button or from RingCentral. The Token will automatically refresh until access is revoked.
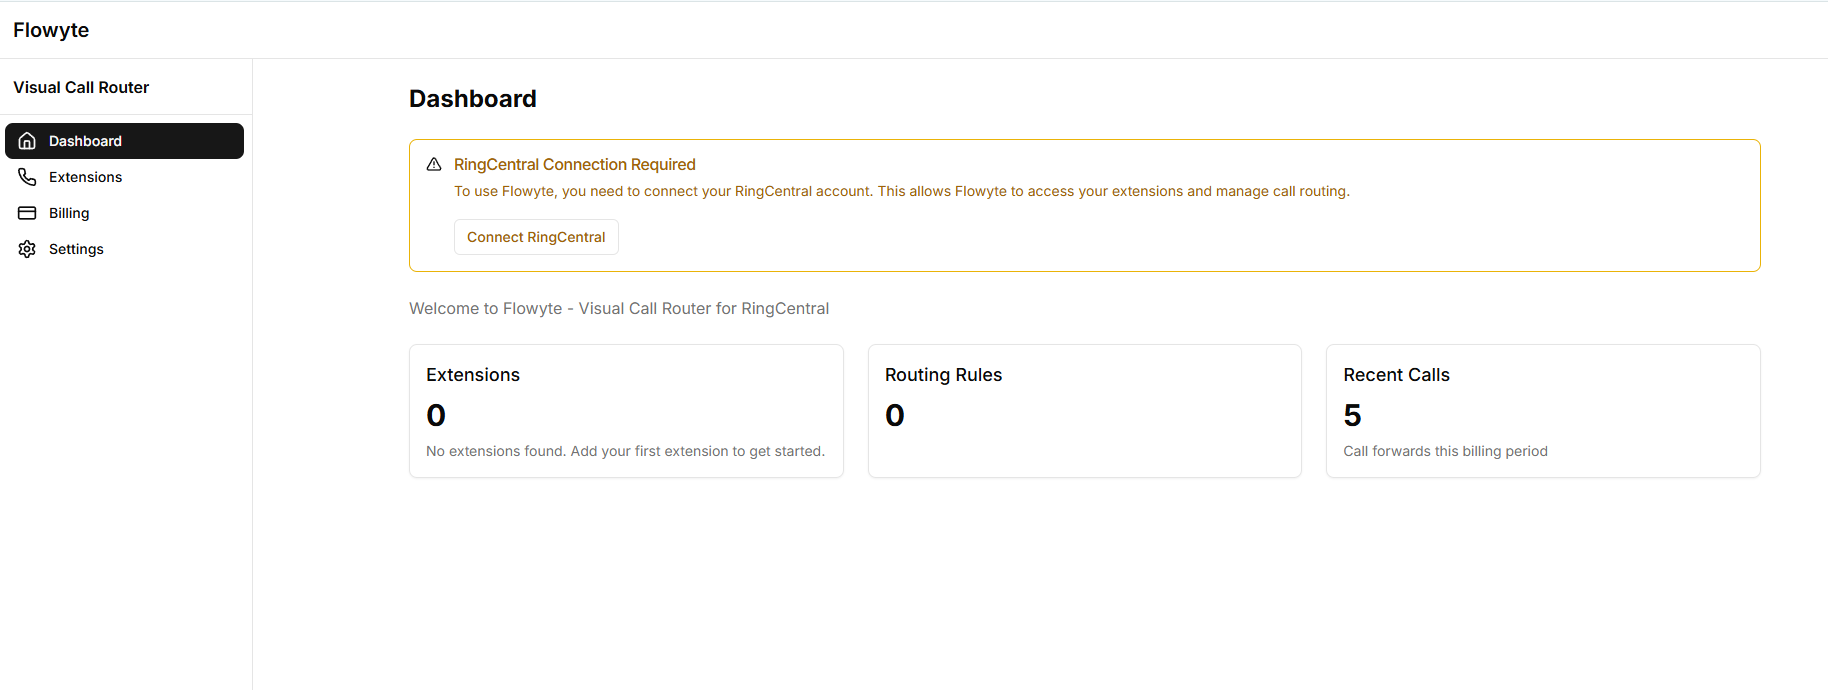
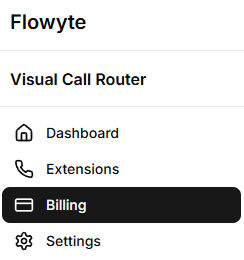
3. Dashboard Overview
After successful setup, you'll land on your dashboard, which provides an overview of your call routing system.

3.1 Dashboard Components
- Navigation Sidebar: Access different sections of the application
- Extensions Summary: Shows the number of configured extensions
- Routing Rules Summary: Displays total number of active routing rules
- Recent Call Activity: Shows recent call forwarding statistics

4. Adding Extensions
4.1 Navigate to Extensions
Click on "Extensions" in the sidebar navigation.
4.2 Add a New Extension
Click the "Add Extension from RingCentral" button.

4.3 Select an Extension
Choose from the list of available RingCentral extensions to add to Flowyte.

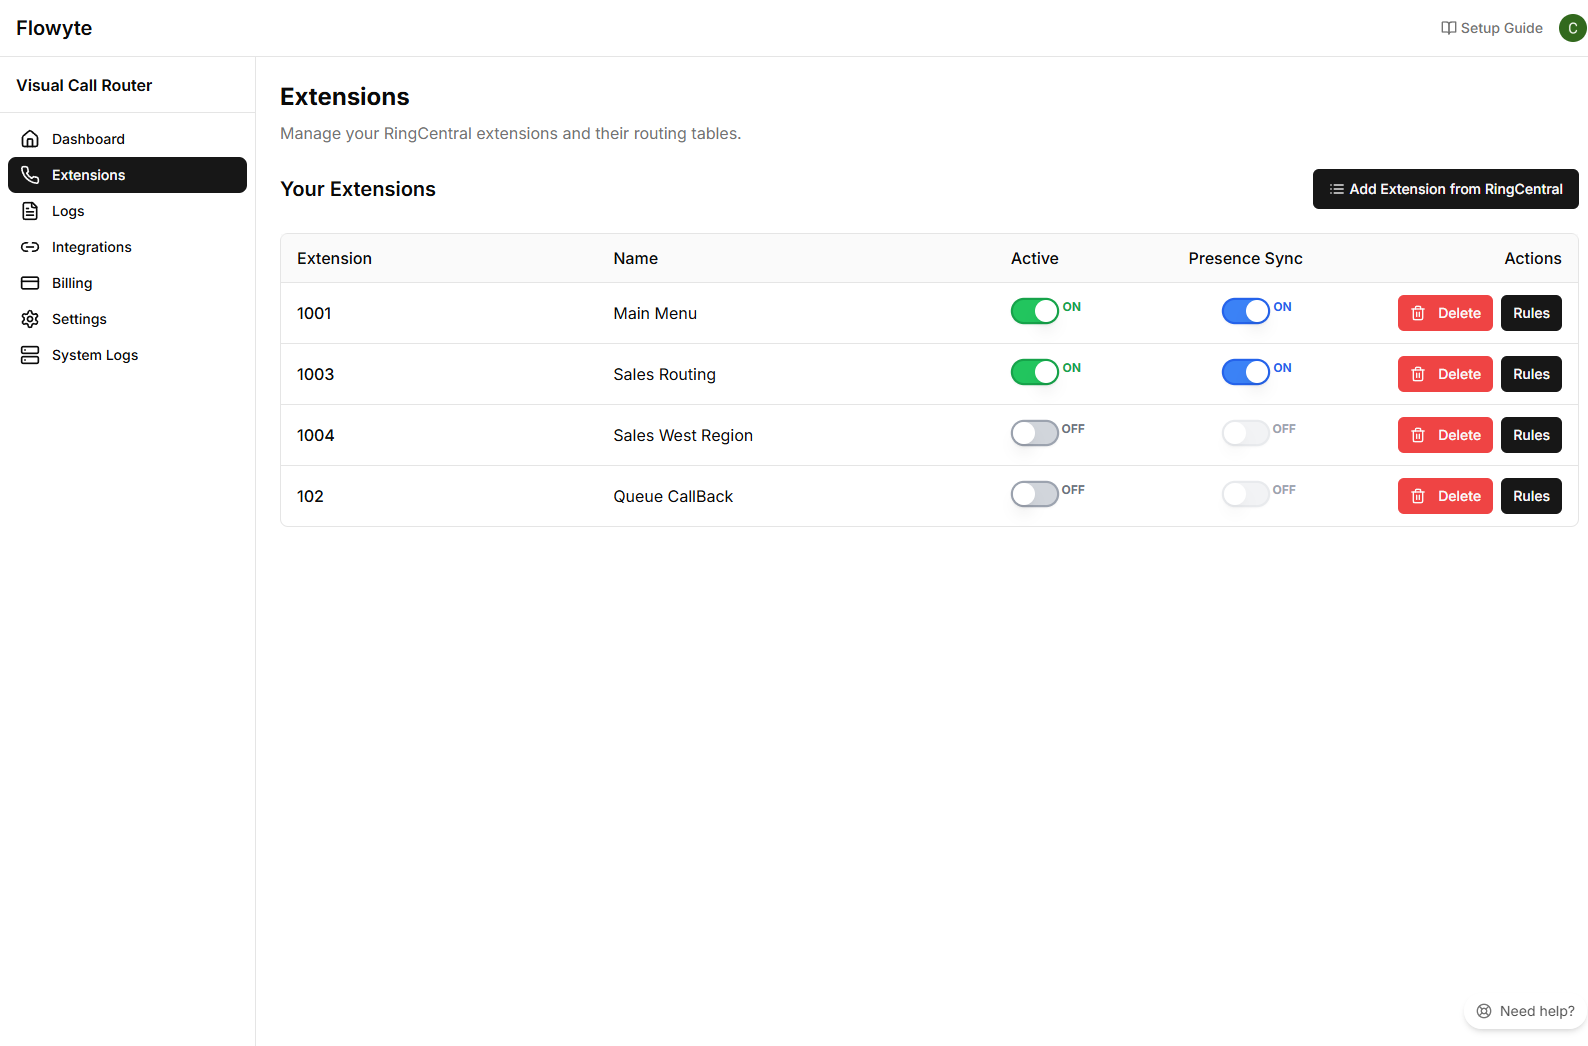
4.4 View Extensions List
Your newly added extension will appear in the extensions list.
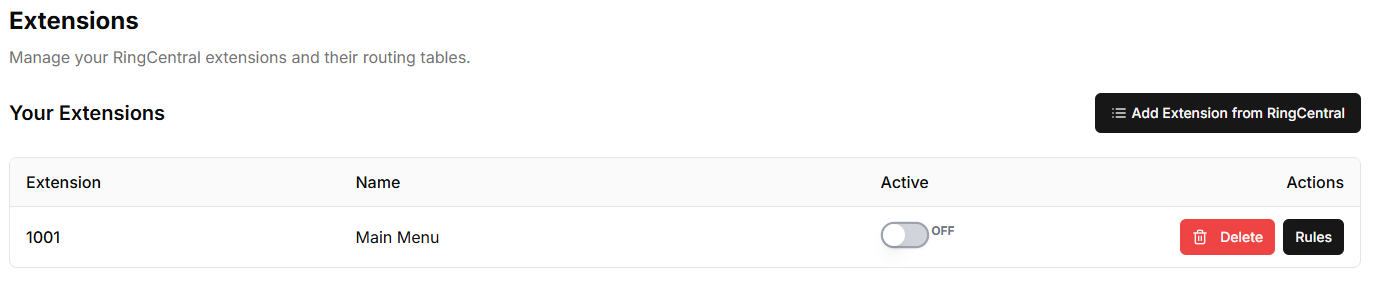
4.5 Activate Extension
Toggle the switch to activate the extension for call routing (ON position).
5. Creating Routing Rules
5.1 Select an Extension
From the Extensions list, click on the "Rules" button for the extension you want to configure.

5.2 Add a New Rule
On the extension details page, click the "Add Rule" button.

5.3 Configure Rule
Fill in the rule details:
- Caller ID (or select "Default Rule")
- You may use the star key to have variables such as 928* would route anything with a 928 area code to the destination of choice.
- Destination Type (Extension or External)
- Destination (extension number or phone number)
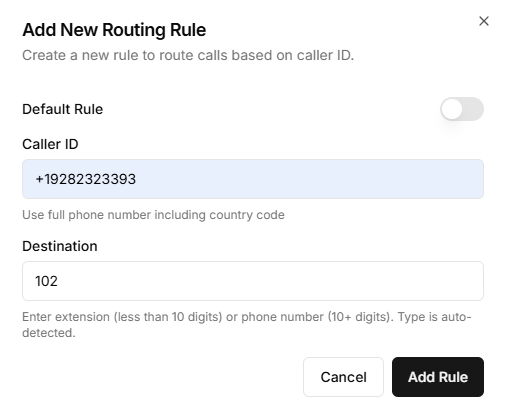
5.4 Save the Rule
Click "Add Rule" to save your new routing rule.

5.5 View Rules List
Your new rule will appear in the rules list.
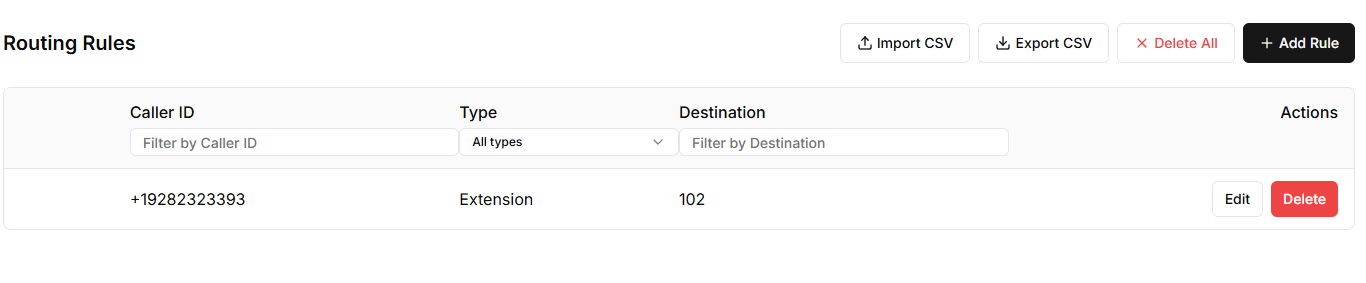
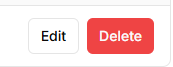
5.6 Edit or Delete Rules
Use the actions column to edit or delete existing rules.
6. Geographic Routing Setup
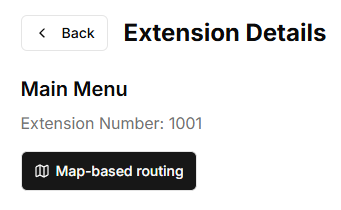
6.1 Enable Map-Based Routing
On the extension details page, toggle the "Enable Map-Based Routing" switch.
This feature is only available for Premium Accounts. See billing tab to upgrade.
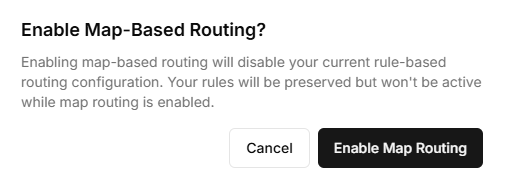
6.2 Confirm Switching to Map-Based Routing
Read the warning about switching to map-based routing and confirm.
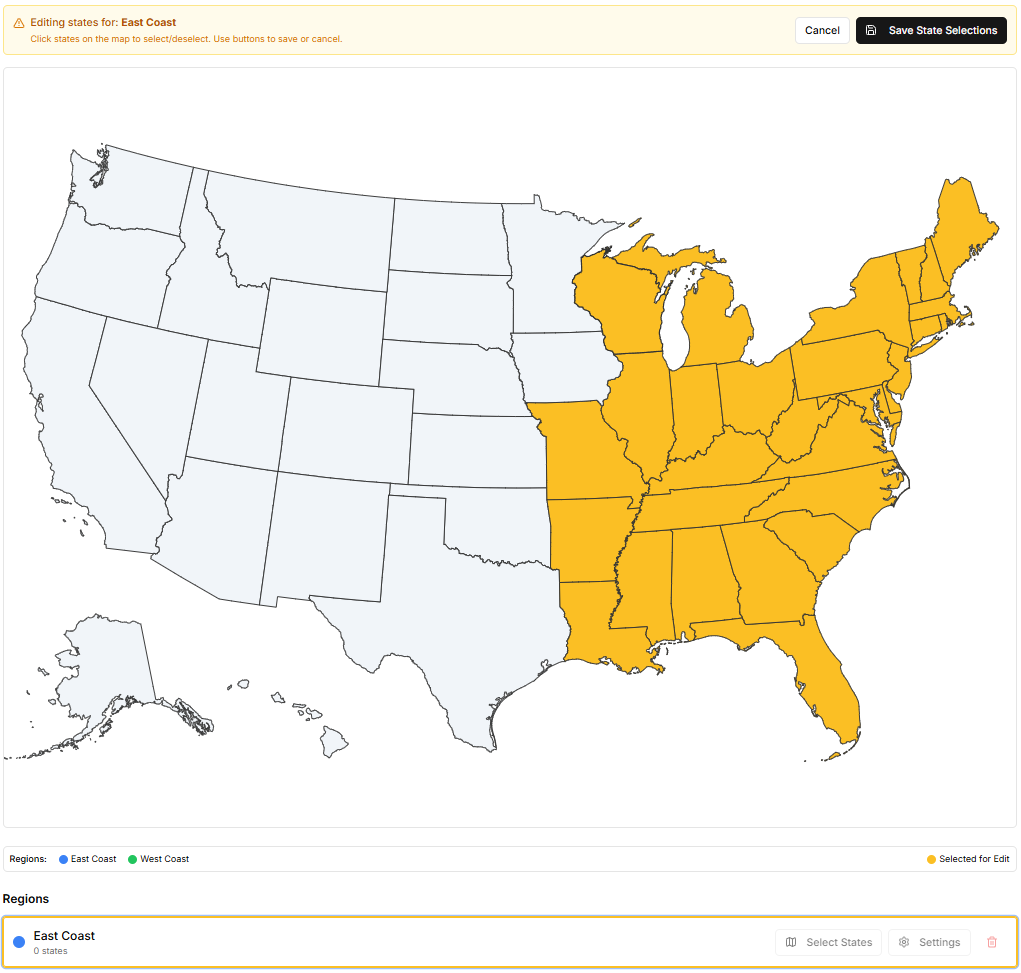
6.3 US Map Interface
The US map interface will appear, showing all states.
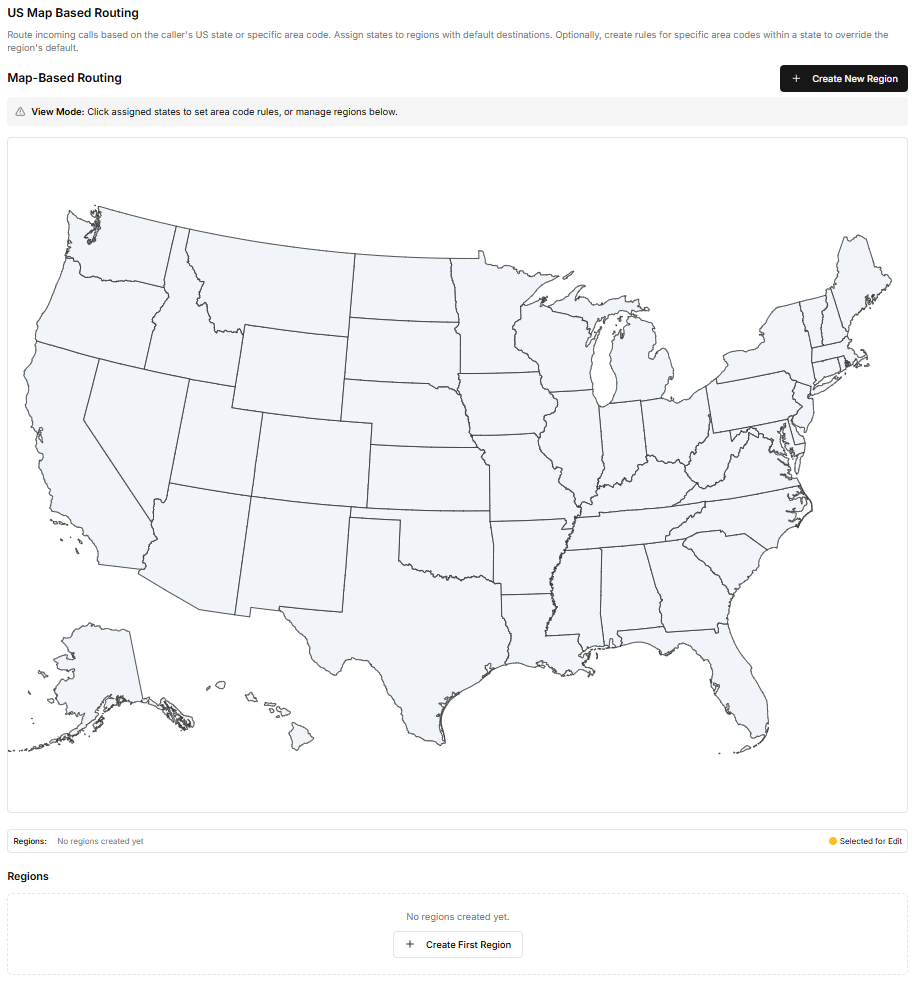
6.4 Create a Region
Click the "Add Region" button to create a new geographic region.

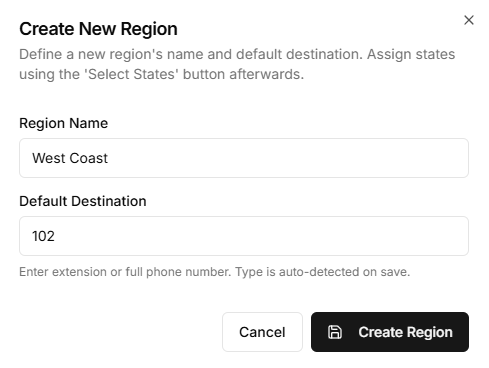
6.5 Configure Region
Name your region and select the states that belong to it.
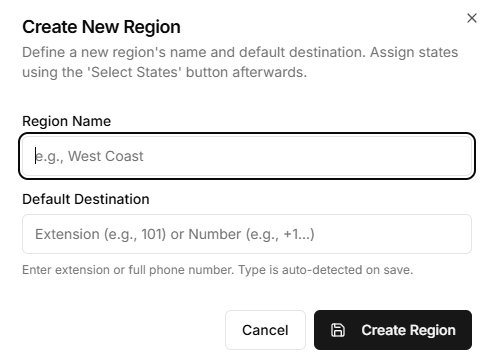
6.6 Set Region Destination
Choose where calls from this region should be forwarded:
- Extension number
- External phone number
6.7 Select States
Choose the "Select States" button to assign the states to the region. Click save to move onto the next region.
7. Testing Your Configuration
7.1 Test Flow
From an external phone, call into your RingCentral call flow, verify the calls are being routed properly. You may check the RingCentral Analytics to see the redirected calls as needed.
If you need any assistance please reach out to support@flowyte.com
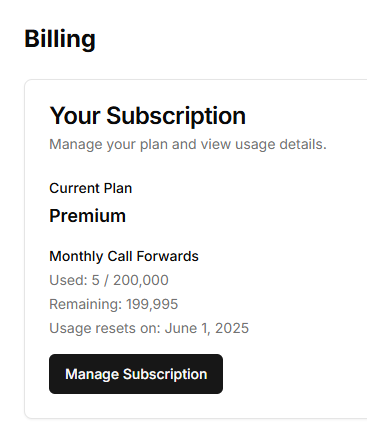
8. Managing Your Subscription
8.1 Access Billing
Go to "Settings" > "Billing & Subscription" in the sidebar.
8.2 View Current Plan
Review your current plan details:
- Plan name
- Features
- Usage limits
- Renewal date
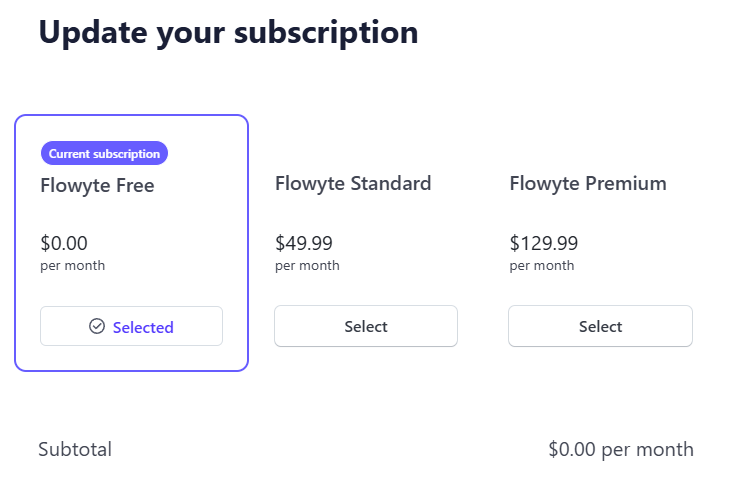
8.3 Upgrade Plan
Click "Upgrade Subscription" to view available plan options.

8.4 Update Payment Information
Manage your payment methods in the Payment Methods section. If subscription is cancelled, you will have access until the end of the billing cycle.
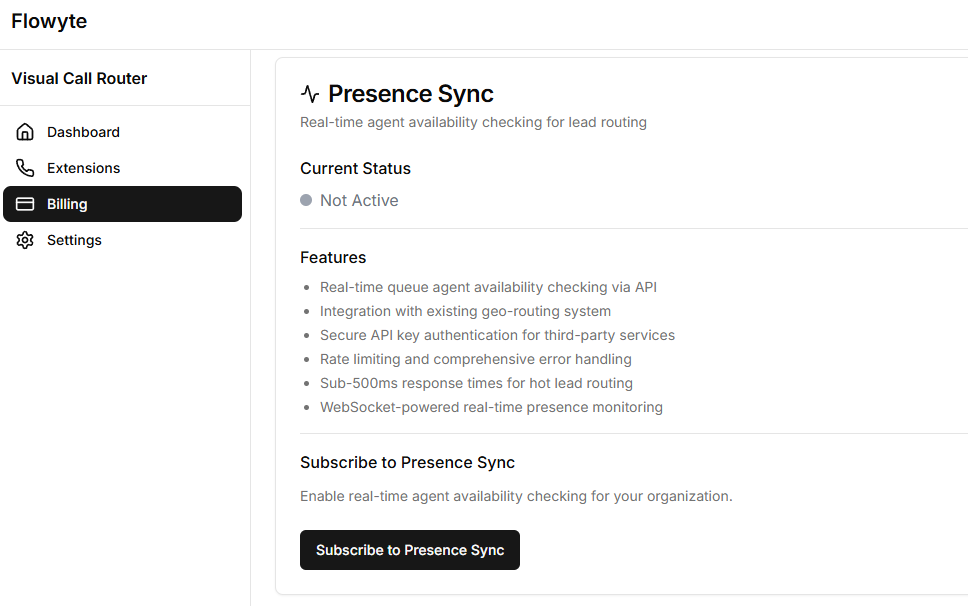
9. API Presence Sync (Premium Feature)
Prerequisites: This feature requires an active Premium subscription and is available as an add-on service. This is crucial for businesses using RTB leads, insurance reps licensed in specific states, or legal/financial services that need to verify agent availability before routing calls.
9.1 Subscribe to Presence Sync Add-on
From the Billing page, locate the Presence Sync add-on and click "Subscribe" to enable this premium feature.
9.2 Access Integrations Tab
Once subscribed, the "Integrations" tab will appear in your sidebar navigation. Navigate to this new section to configure your API presence sync.
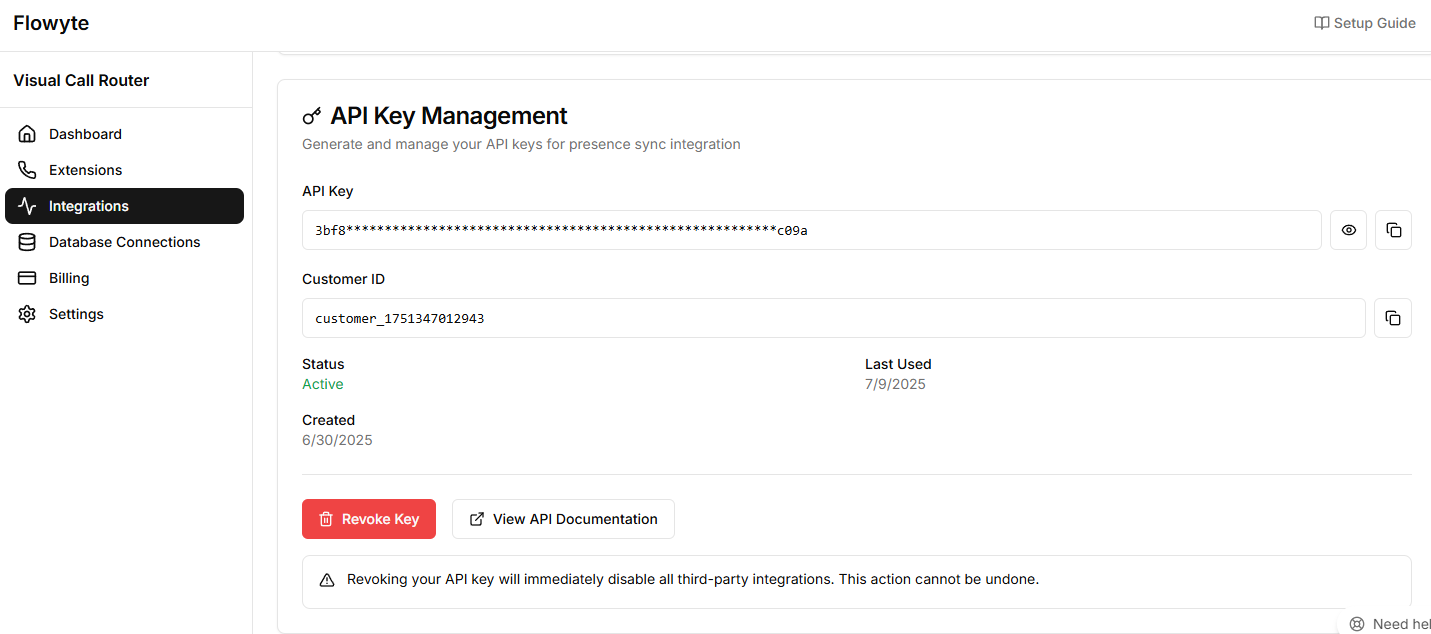
9.3 Generate API Keys
In the Integrations tab, create your API keys that will be used to query agent presence status. These keys are essential for checking queue availability before routing calls.
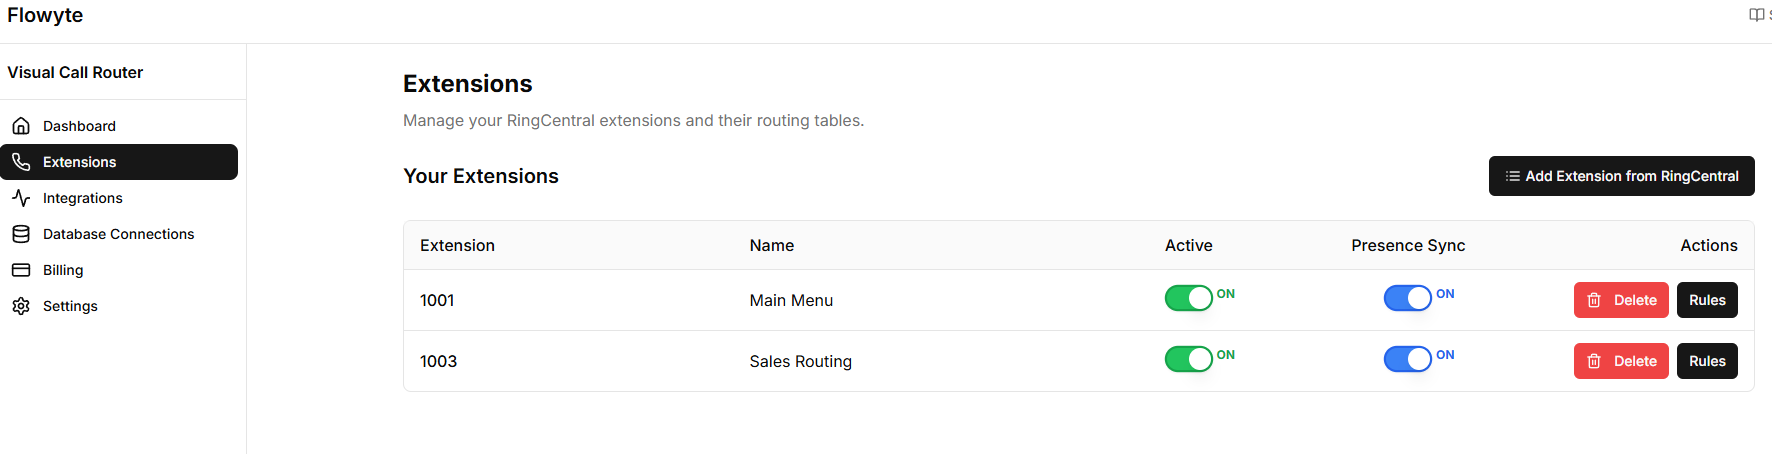
9.4 Enable Presence Sync on Extensions
Navigate to your Extensions and enable presence sync only on inbound routing extensions. This is critical - do not enable this on regular extensions.
Important: Only enable presence sync on inbound routing extensions. The system will automatically detect downstream possible queues.
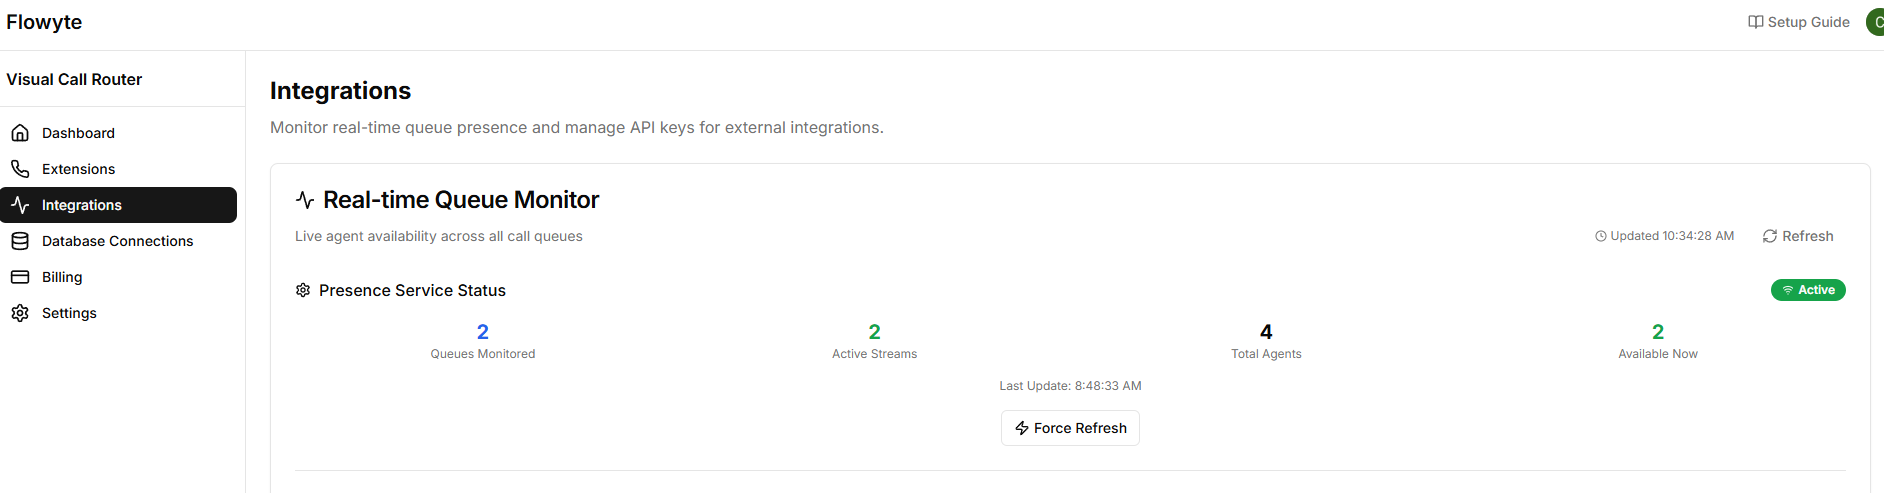
9.5 Monitor Queue Presence
Return to the Integrations tab to view the real-time presence monitoring of your queues. You'll see the status of all downstream queues that the system has automatically detected.
Note: Downstream extensions must be configured as queues in RingCentral for presence monitoring to work properly.
9.6 Use Cases Overview
API Presence Sync is particularly valuable for:
- RTB (Real-Time Bidding) Leads: Verify agent availability before accepting expensive leads
- Insurance Companies: Ensure licensed agents are available in specific states before routing calls
- Legal Services: Route calls to attorneys licensed in the caller's jurisdiction
- Financial Services: Connect clients with appropriately licensed advisors
- Geographic Compliance: Ensure regulatory compliance by routing to properly licensed professionals
Next Steps: With presence sync configured, you can now use API queries to check agent availability before routing calls. This helps prevent wasted leads and ensures optimal call distribution.
9.7 API Endpoints Overview
The Presence Sync API provides a single endpoint for checking agent availability in real-time. When you make an API call, the system follows the exact same routing logic as a real call would, determining the destination queue based on your configured rules and geographic routing.
Base URL
https://flowyte.com/api/presence/check-availabilityAuthentication
All API requests require authentication using your API key in the Authorization header:
9.8 API Request Examples
Basic Availability Check
Check if agents are available for a specific phone number using your routing logic:
{
  "number": "+14805551234",
  "customer_id": "cust_flw_9a8b7c6d5e4f",
  "call_id": "call_abc123"
}
Specific Queue Check
Check availability for a specific inbound routing extension:
Important: If you have more than one inbound routing extension with Flowyte enabled, or plan to in the future, make sure to include the inbound_queue_ext parameter to specify which extension's routing rules to follow. Without this, the system will use your default presence-enabled extension.
{
  "number": "+19285559876",
  "customer_id": "cust_flw_2x9y8z3w4v5u",
  "inbound_queue_ext": "1001",
  "call_id": "rtb_call_456"
}
🚨 Critical: Customer ID Requirement
The customer_id field must be the exact customer ID generated by Flowyte when you created your API key. This is not your internal customer identifier. You can find your Flowyte-generated customer ID in the Integrations tab where your API keys are displayed. Using an incorrect customer_id will result in authentication errors.
API Request Field Explanations
Required Fields:
number- The caller's phone number
Format: +1AAANNNNNNN (e.g., +14805551234). Can include dashes, spaces, or parentheses - they will be stripped automatically.customer_id- Your Flowyte-generated customer ID
This is the specific customer ID generated by Flowyte when you created your API key. Found in the Integrations tab where your API keys are displayed. This must match the customer ID associated with your API key.
Optional Fields:
inbound_queue_ext- Specific inbound routing extension
Found in your Extensions list in Flowyte - use the RingCentral Extension Number (e.g., "1001", "2500"). Required if you have multiple inbound routing extensions.call_id- Unique call tracking identifier
Any unique string to correlate API requests with actual calls in your logs. Helpful for debugging and analytics.
9.9 API Response Examples
Successful Response - Agents Available
{
  "available": true,
  "queue_found": true,
  "queue_name": "Arizona Sales Team",
  "total_agents": 5,
  "available_agents": 2,
  "response_time_ms": 45,
  "timestamp": "2025-01-10T15:30:45.123Z",
  "call_id": "call_abc123"
}
Successful Response - No Agents Available
{
  "available": false,
  "queue_found": true,
  "queue_name": "Legal Services - CA",
  "total_agents": 3,
  "available_agents": 0,
  "response_time_ms": 38,
  "timestamp": "2025-01-10T15:31:12.456Z",
  "call_id": "rtb_call_456"
}
Error Response - No Queue Found
{
  "error": true,
  "message": "No routing rules found for this number",
  "code": "NO_ROUTE_FOUND",
  "timestamp": "2025-01-10T15:32:01.789Z",
  "call_id": "call_abc123"
}
Error Response - Invalid API Key
{
  "error": true,
  "message": "Invalid or expired API key",
  "code": "INVALID_API_KEY",
  "timestamp": "2025-01-10T15:33:15.012Z"
}
9.10 How Routing Logic Works
When you make a presence check API call, Flowyte follows the exact same logic path that a real incoming call would take:
1. Number Analysis
The system extracts the area code from the caller's phone number and determines the caller's state using the same lookup tables used for live calls.
2. Extension Routing
If you specify an inbound_queue_ext, the system checks that extension's routing rules. If not specified, it uses your default inbound routing extension with presence sync enabled.
3. Geographic Routing
For extensions with map-based routing enabled, the system checks your configured regions to find which queue should handle calls from that state/area code.
4. Standard Rules Fallback
If geographic routing doesn't find a match, the system falls back to your standard routing rules (caller ID patterns, default rules) just like a real call would.
5. Queue Presence Check
Once the destination queue is determined, the system checks the real-time presence status of agents in that queue and returns the availability data.
9.11 Integration Examples
RTB Lead Verification (JavaScript)
// Check agent availability before accepting RTB lead
// Note: customer_id must be your Flowyte-generated customer ID from the Integrations tab
const FLOWYTE_CUSTOMER_ID = 'cust_flw_9a8b7c6d5e4f'; // Replace with your actual customer ID

async function checkAgentAvailability(phoneNumber, leadId) {
  try {
    const response = await fetch('https://flowyte.com/api/presence/check-availability', {
      method: 'POST',
      headers: {
        'Authorization': 'Bearer flw_live_sk_1234abcd5678efgh',
        'Content-Type': 'application/json'
      },
      body: JSON.stringify({
        number: phoneNumber,
        customer_id: FLOWYTE_CUSTOMER_ID, // Use your Flowyte-generated customer ID
        call_id: `rtb_${leadId}_${Date.now()}`
      })
    });

    const data = await response.json();

    if (data.available && data.available_agents > 0) {
      // Accept the lead - agents are available
      return { accept: true, queue: data.queue_name };
    } else {
      // Reject the lead - no agents available
      return { accept: false, reason: 'No agents available' };
    }
  } catch (error) {
    // Handle API errors
    console.error('Presence check failed:', error);
    return { accept: false, reason: 'API error' };
  }
}

// Example usage:
// checkAgentAvailability('+14805551234', 'lead_12345')
Insurance State Compliance (Python)
# Verify licensed agents are available in caller's state
# Note: customer_id must be your Flowyte-generated customer ID from the Integrations tab
import requests
import json

# Replace with your actual Flowyte-generated customer ID
FLOWYTE_CUSTOMER_ID = "cust_flw_2x9y8z3w4v5u"

def check_licensed_agent_availability(phone_number, internal_customer_id):
    url = "https://flowyte.com/api/presence/check-availability"
    headers = {
        "Authorization": "Bearer flw_live_sk_5678wxyz9012mnop",
        "Content-Type": "application/json"
    }

    payload = {
        "number": phone_number,
        "customer_id": FLOWYTE_CUSTOMER_ID,  # Use your Flowyte-generated customer ID
        "inbound_queue_ext": "1002",  # Insurance intake queue
        "call_id": f"insurance_{internal_customer_id}"
    }

    try:
        response = requests.post(url, headers=headers, json=payload)
        data = response.json()

        if response.status_code == 200:
            if data["available"] and data["available_agents"] > 0:
                return {
                    "route_call": True,
                    "queue": data["queue_name"],
                    "agents_available": data["available_agents"]
                }
            else:
                return {
                    "route_call": False,
                    "reason": "No licensed agents available",
                    "total_agents": data.get("total_agents", 0)
                }
        else:
            return {
                "route_call": False,
                "reason": f"API Error: {data.get('message', 'Unknown error')}"
            }

    except Exception as e:
        return {
            "route_call": False,
            "reason": f"Connection error: {str(e)}"
        }

# Example usage:
# result = check_licensed_agent_availability('+19285559876', 'customer_789')
🚀 Pro Tips for Integration
- Rate Limiting: The API is rate-limited to prevent abuse. Cache results for a few seconds when possible.
- Timeout Handling: Set reasonable timeouts (5-10 seconds) for your API calls.
- Error Handling: Always handle API errors gracefully - assume agents are unavailable on errors.
- Call ID Tracking: Use unique call IDs to correlate API checks with actual calls in your logs.
- Response Time: Typical response times are 20-100ms for optimal lead routing decisions.
10. Google Sheets Integration (Premium Feature)
Prerequisites: This feature requires an active Premium subscription ($129.99/month). Google Sheets integration allows you to sync routing rules directly from Google Sheets, eliminating manual CSV uploads and ensuring your data is always up-to-date.
10.1 Prerequisites and Overview
The Google Sheets integration provides several key benefits for Premium subscribers:
- Real-time synchronization with your Google Sheets
- Automatic routing rule updates when sheet data changes
- Advanced column mapping for complex data structures
- Collaborative editing - multiple team members can update routing rules
- Large dataset support for 10k+ routing rules
10.2 Connect Your Google Account
Navigate to the Integrations tab in your Flowyte dashboard to set up the Google Sheets connection.
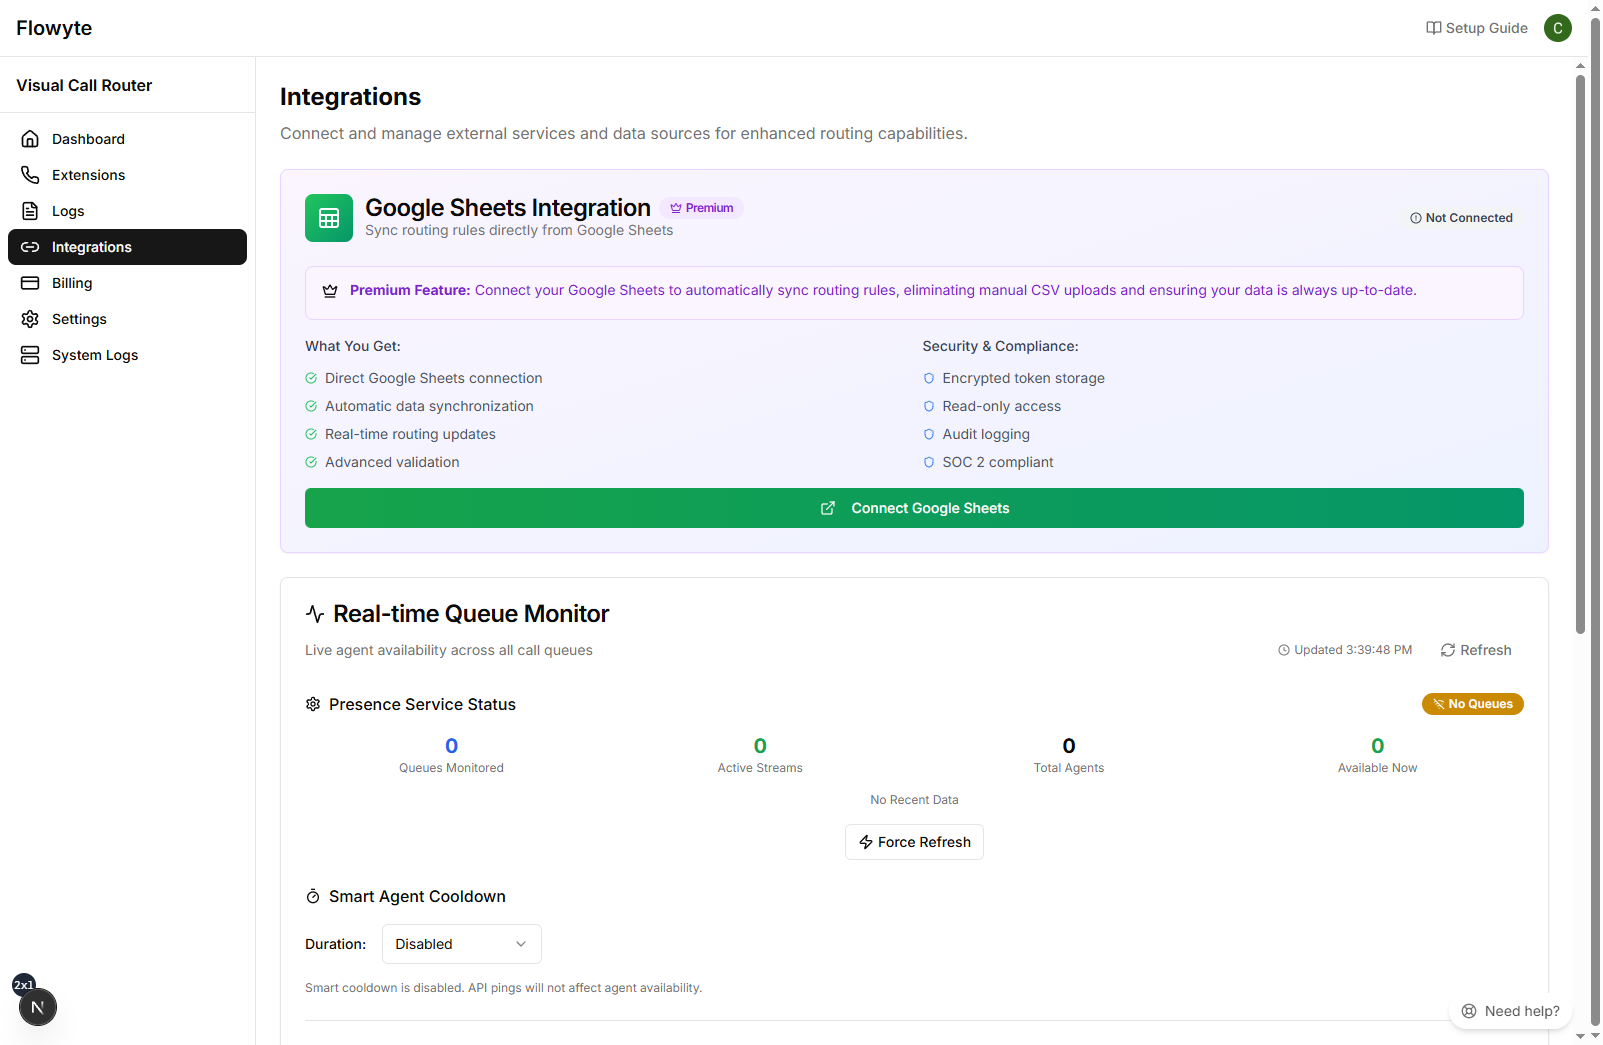
Initially, the Google Sheets integration card will show "Not Connected" status. Once you connect your Google account, you'll see your account details and available premium features.
10.3 Connected State Overview
After successfully connecting your Google account, the integration card will display:
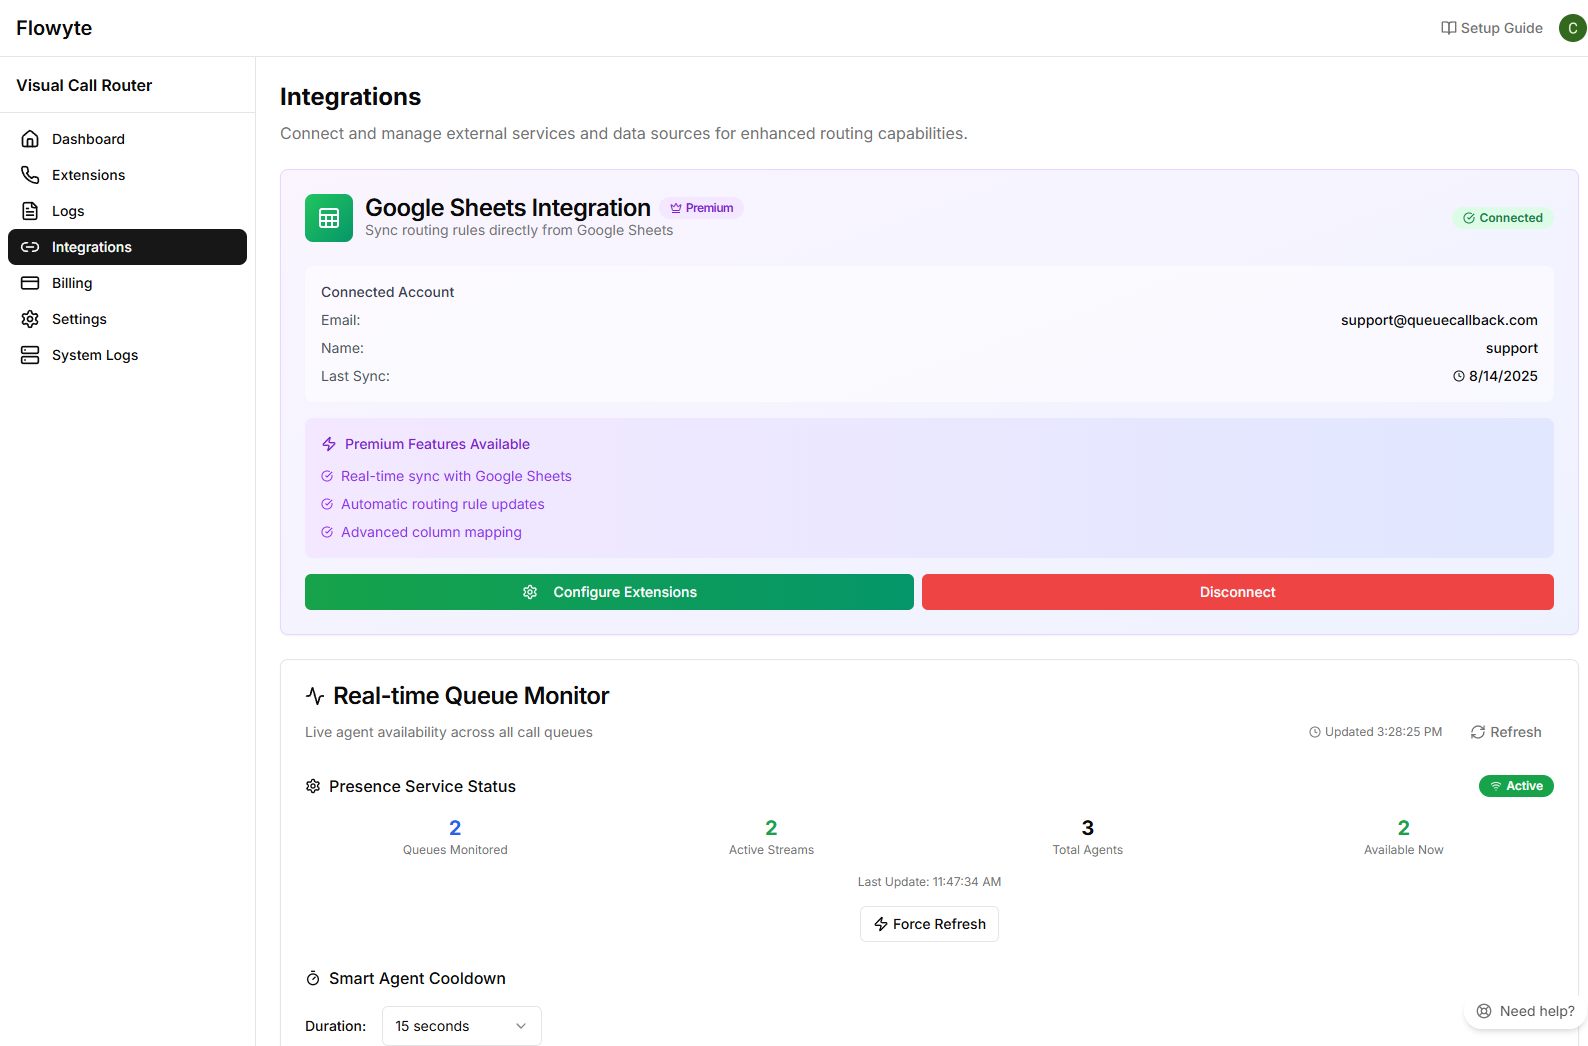
- Connected Account: Your Google email and last sync time
- Premium Features Available: Real-time sync, automatic updates, advanced validation
- Security & Compliance: Encrypted storage, read-only access, audit logging
10.4 Configure Extensions for Google Sheets
After connecting your Google account, configure Google Sheets integration for specific extensions.
Navigate to Extensions and click "Rules" for the extension you want to configure with Google Sheets.
10.5 Configure Google Sheets for Individual Extensions
After connecting your Google account, you'll need to configure Google Sheets integration for each extension that should use it. Navigate to Extensions and click "Rules" for your desired extension.
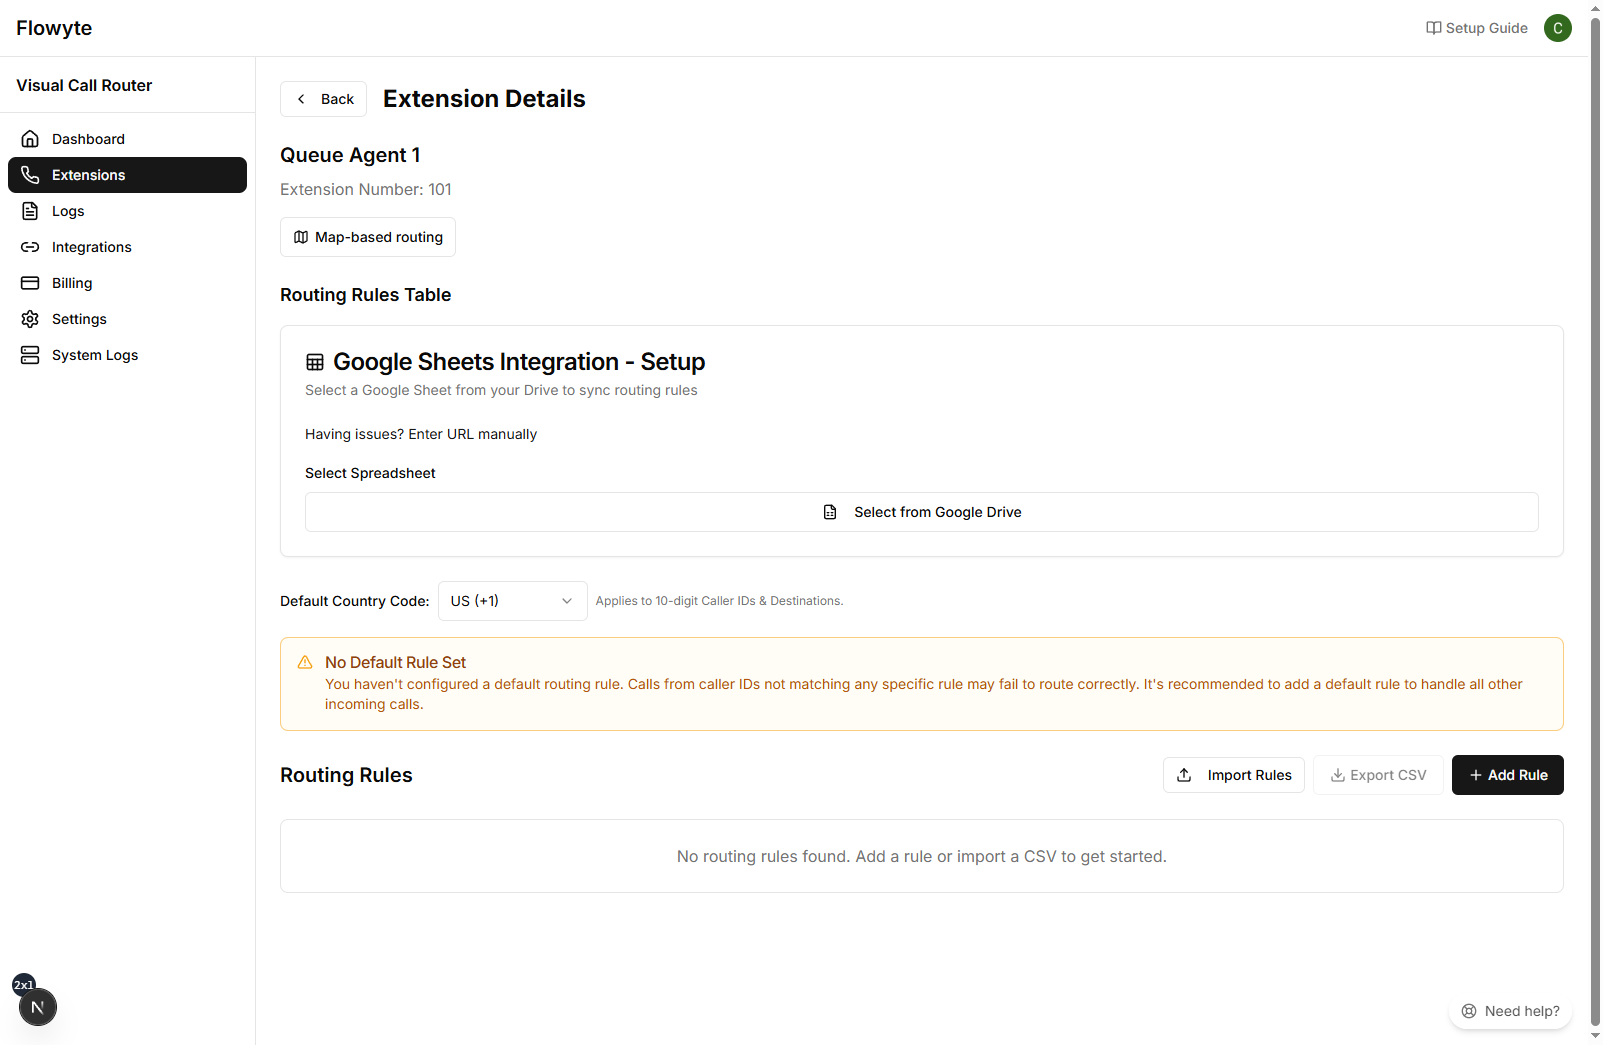
🎯 Step 1: Select Your Google Spreadsheet
Click "Select from Google Drive" to choose which spreadsheet contains your routing rules. The system will load all spreadsheets from your connected Google account.
10.6 Choose Worksheet and Configure Auto-Sync
Once you've selected a spreadsheet, choose the specific worksheet tab that contains your routing data and configure how frequently Flowyte should sync changes.
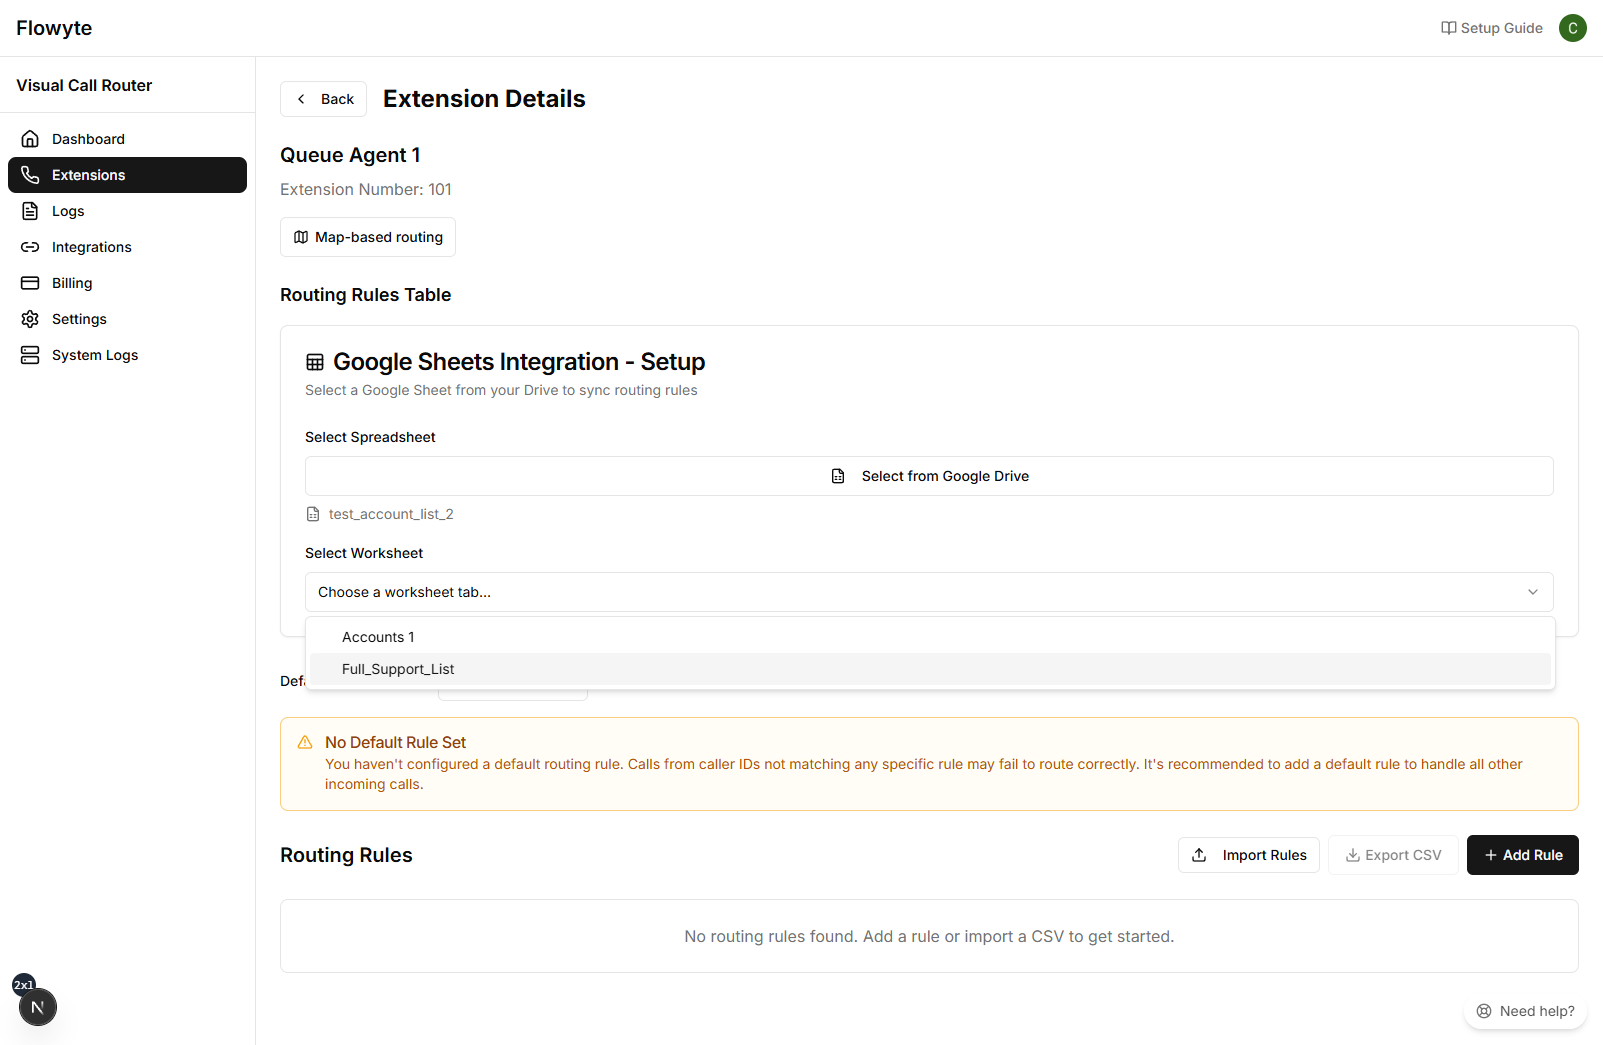
Worksheet Selection:
- • Choose the specific tab/worksheet containing your routing rules
- • Example worksheets: "Accounts 1", "Full_Support_List", "Customer_Routes"
- • Each extension can use a different worksheet for customized routing
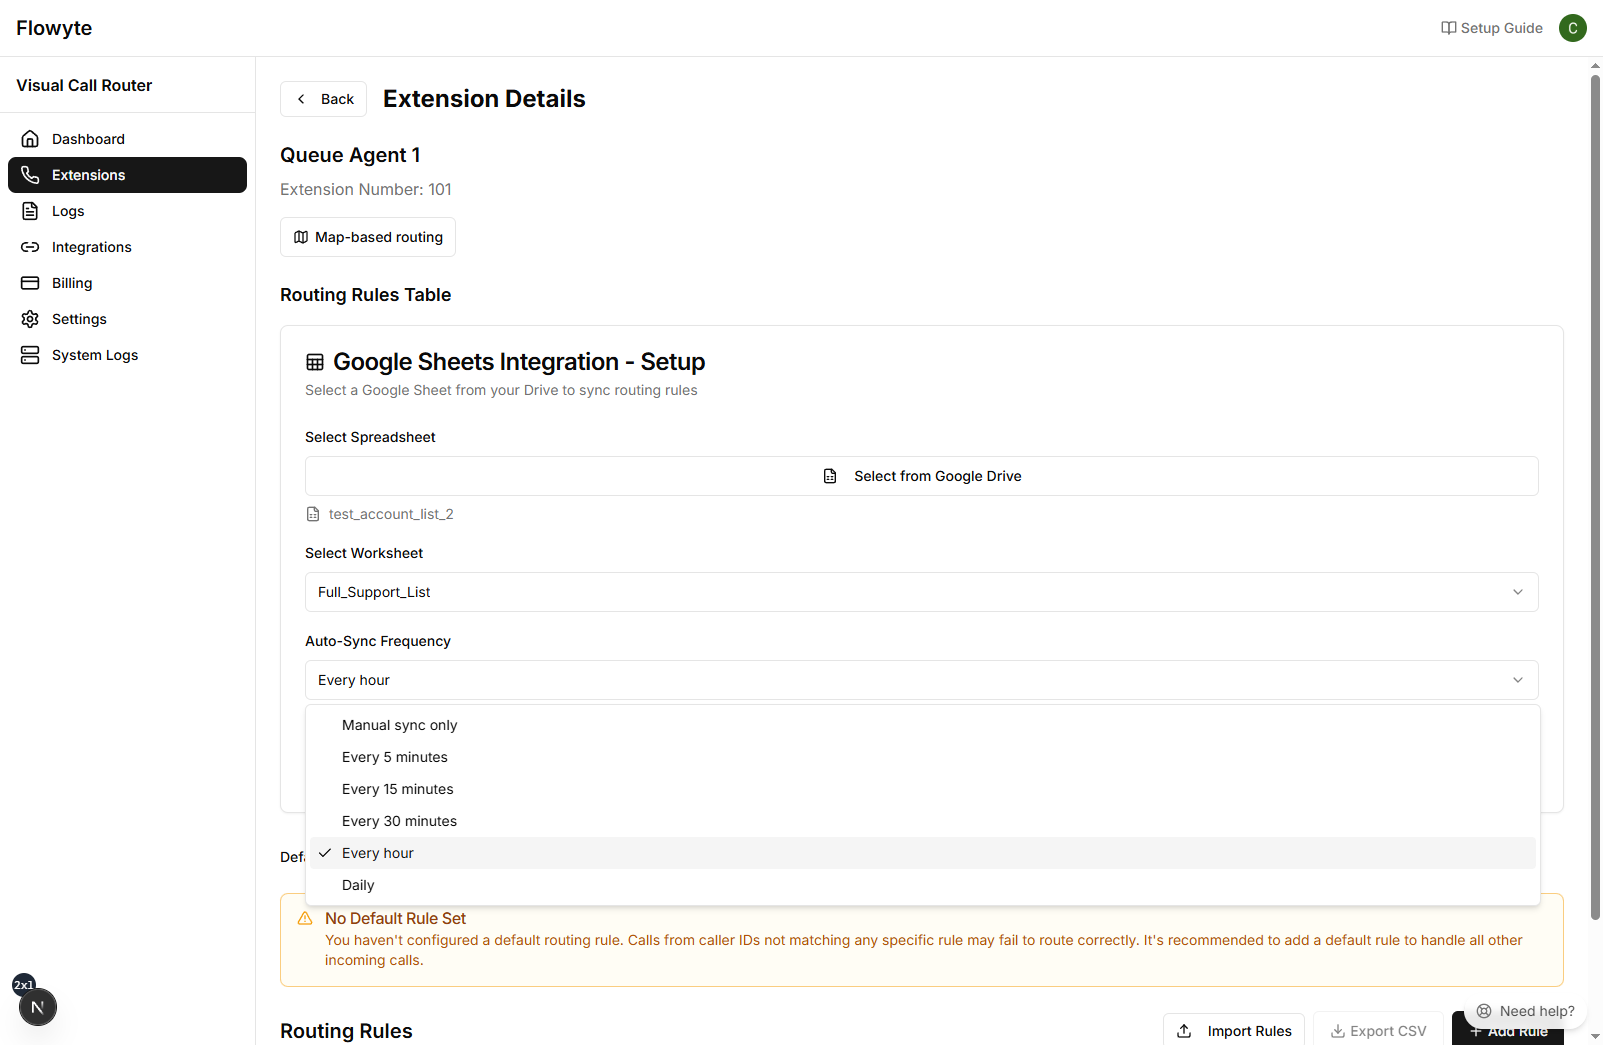
Auto-Sync Frequency Options:
- • Manual sync only - Sync only when triggered manually
- • Every 5 minutes - For high-frequency changes
- • Every 15 minutes - Balanced option for most use cases
- • Every 30 minutes - Regular updates
- • Every hour - For stable routing configurations
- • Daily - For infrequently changing data
10.7 Critical Step: Column Mapping Required
Important: After configuring your Google Sheet, you'll see a warning that column mapping is required. Your routing system will NOT sync or route calls until this step is completed.
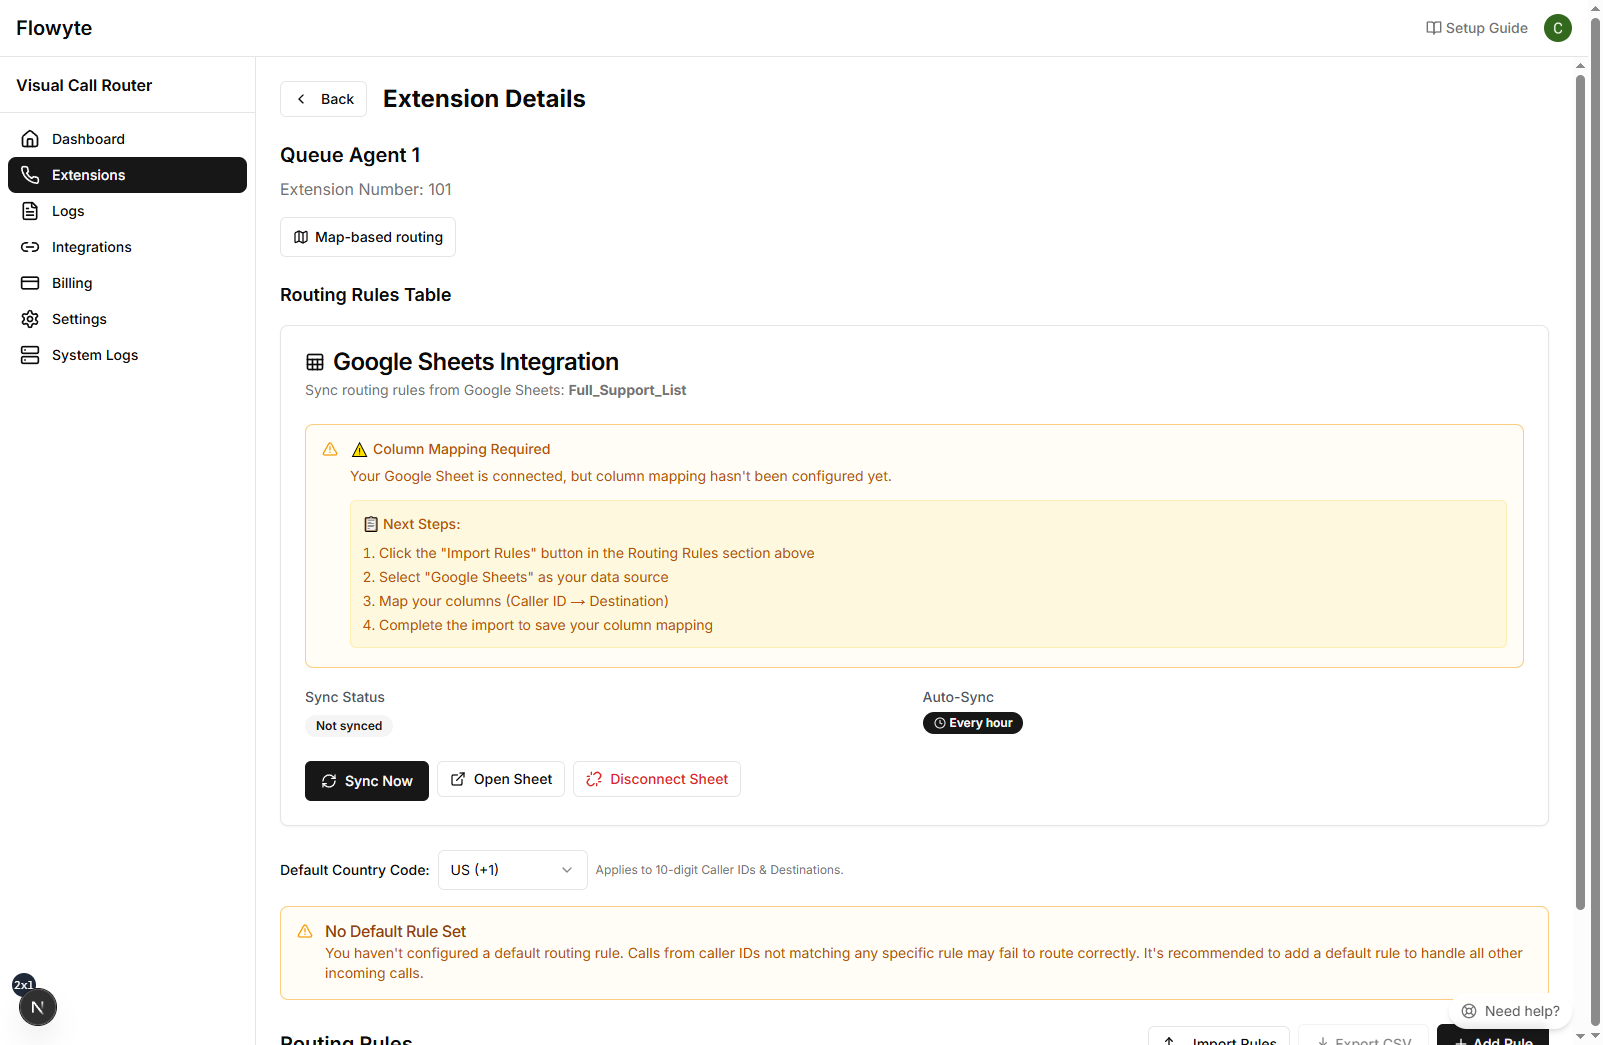
⚠️ Column Mapping Required
Your Google Sheet is connected, but column mapping hasn't been configured yet. The system shows "Not synced" status until this step is completed.
📋 Required Next Steps:
- Click the "Import Rules" button in the Routing Rules section
- Select "Google Sheets" as your data source
- Map your columns (Caller ID → Destination)
- Complete the import to save your column mapping
10.8 Flexible Column Mapping - Use Any Spreadsheet Format
Good news! Flowyte's Google Sheets integration supports any column headers you want to use. You don't need to change your existing spreadsheet format - our flexible column mapping system lets you connect your data to Flowyte's routing fields.
Step 1: Start the Import Process
Click the "Import Rules" button in the Routing Rules section, then select "Google Sheets" as your data source.
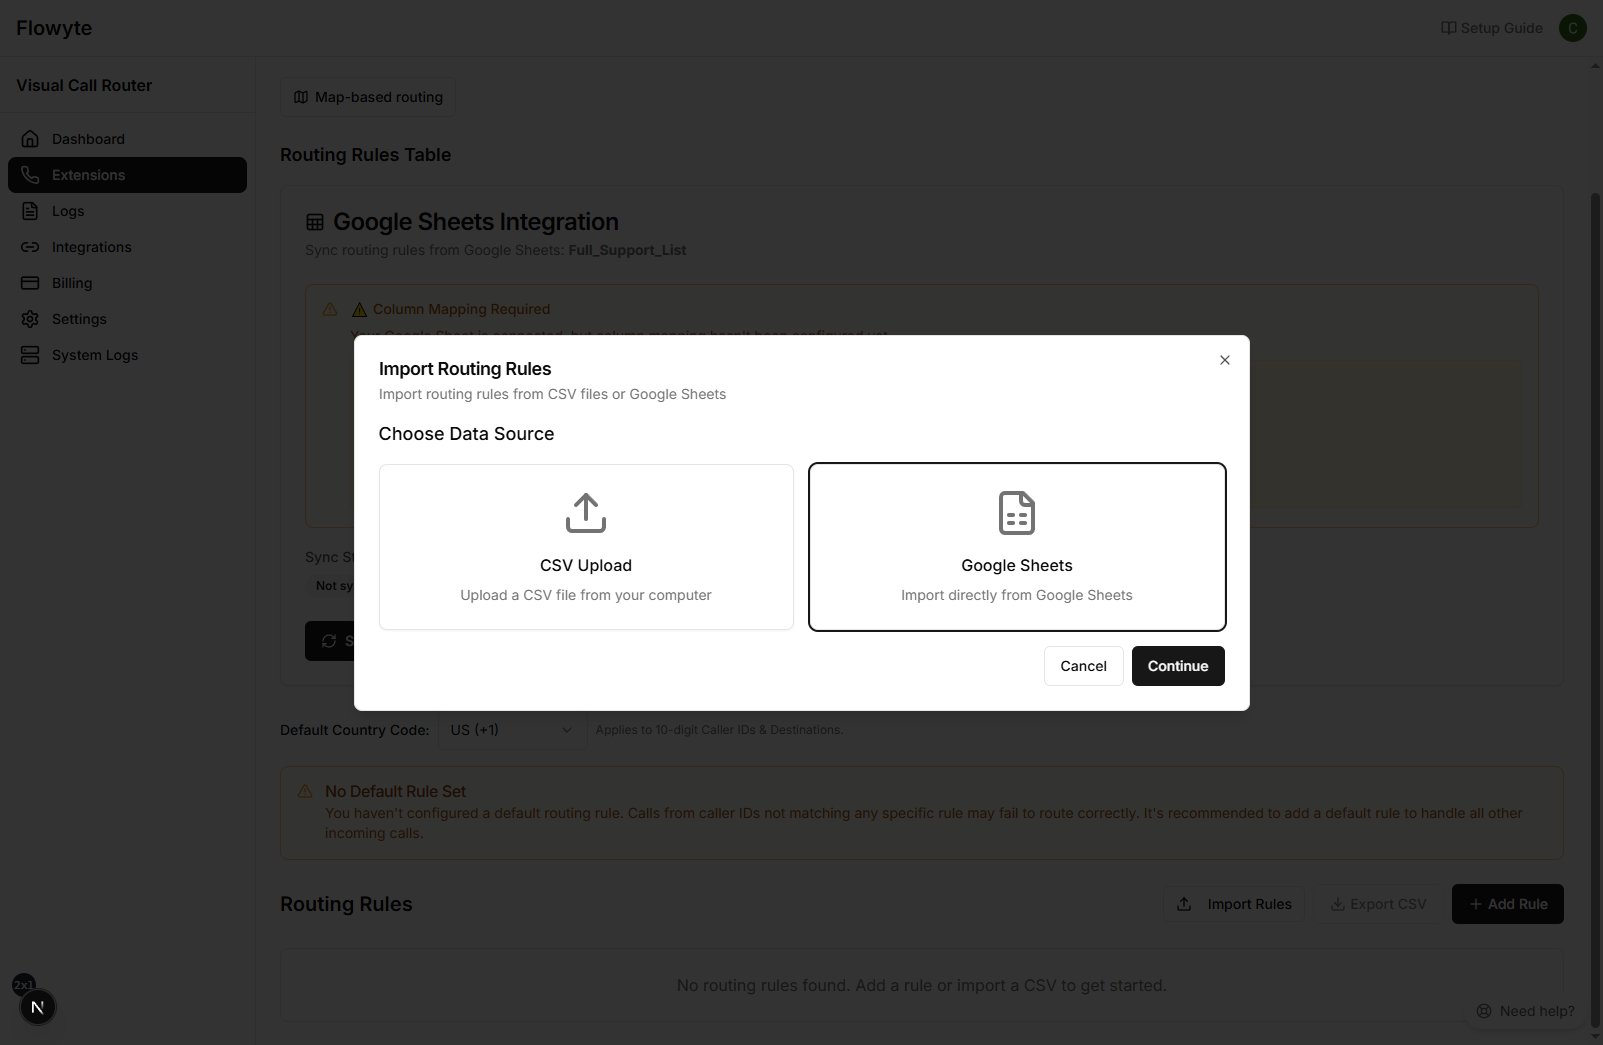
🎯 Step 2: Map Your Existing Columns
Flowyte will analyze your spreadsheet and let you map any of your existing column headers to the required routing fields. No need to rename columns or restructure your data!
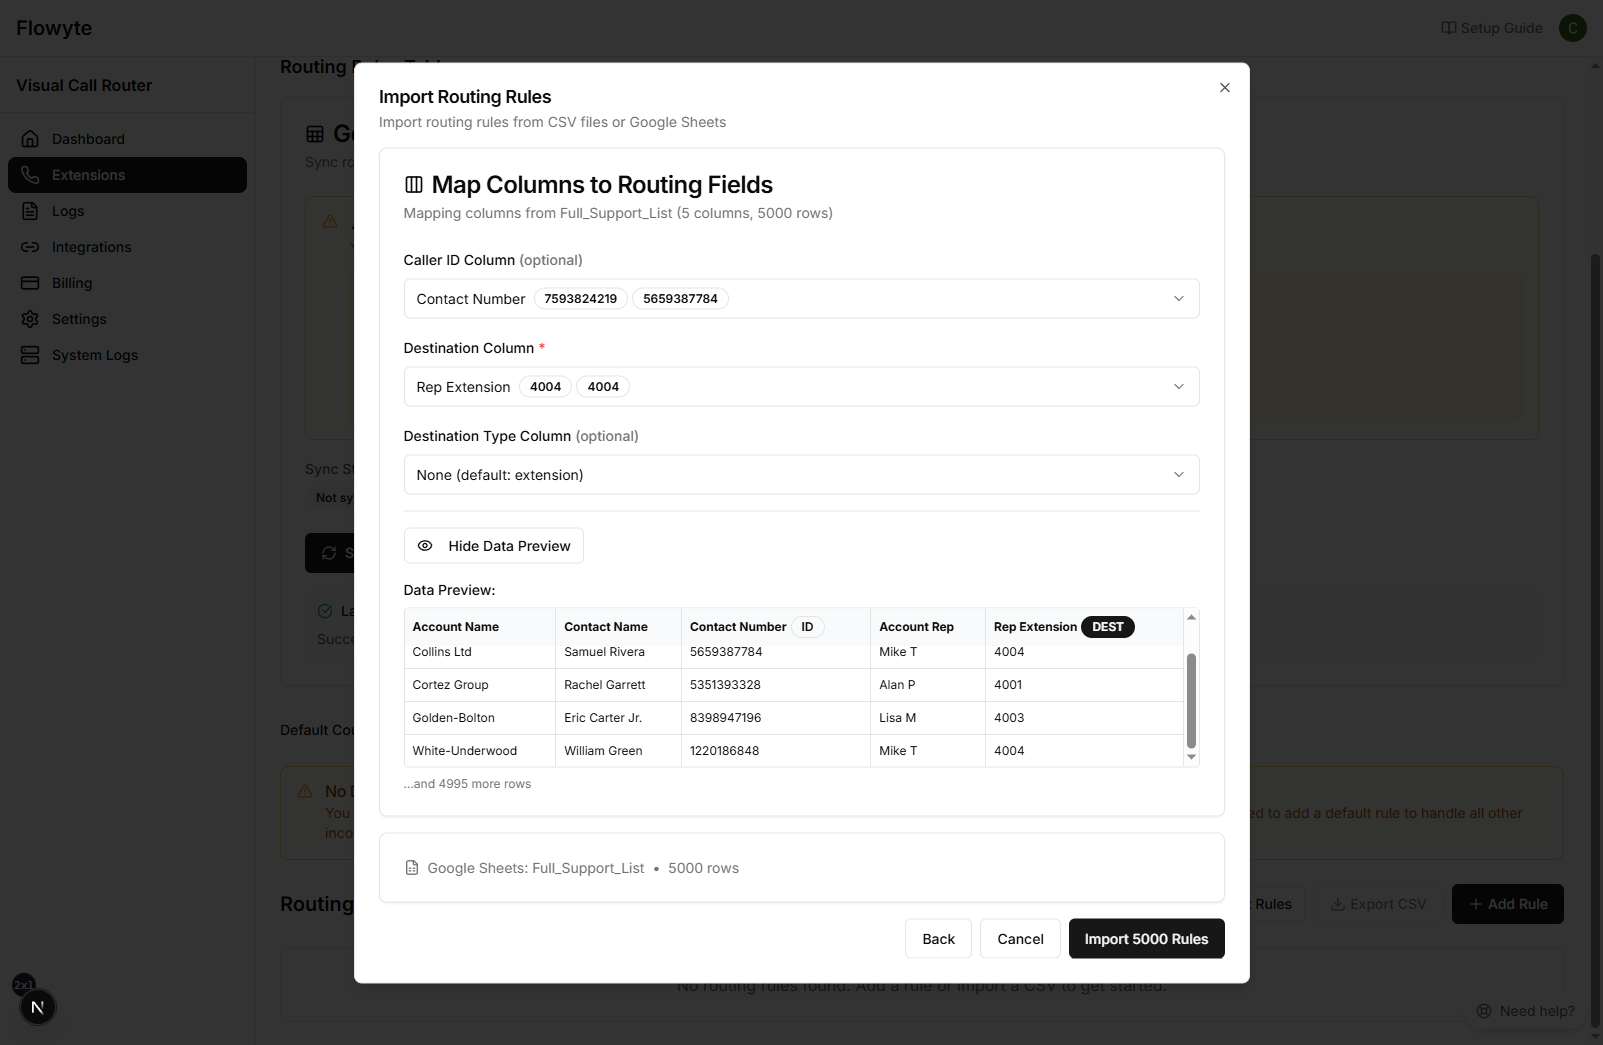
Column Mapping Fields:
- Caller ID Column (optional): Map any column containing phone numbers or patterns. Examples: "Contact Number", "Phone", "Customer ID"
- Destination Column (required): Map the column containing where calls should route. Examples: "Rep Extension", "Assigned Agent", "Route To"
- Destination Type (optional): Map a column specifying "Extension" or "External", or leave as default
💡 Advanced Features Shown Above
- • Live Data Preview: See exactly how your 5000+ rows will be imported
- • Sample Data Display: Preview values from each mapped column
- • Bulk Import: Import thousands of routing rules at once
- • Validation: Real-time feedback on data format and duplicates
- • Static Destination Option: Route all calls to the same destination
Real Example: Any Headers Work
| Your Headers | Maps To | Purpose |
|---|---|---|
| "Contact Number" | → Caller ID | Phone numbers to match |
| "Rep Extension" | → Destination | Where calls route |
| "Call Type" | → Destination Type | Extension vs External |
Result: 5000 routing rules imported from your existing spreadsheet format without any changes needed!
10.9 Best Practices for Google Sheets Integration
Follow these best practices to maximize the effectiveness of your Google Sheets integration and ensure reliable call routing:
Sheet Organization:
- • Use clear, descriptive column headers that make sense to your team
- • Keep data consistent throughout the sheet
- • Add descriptions for complex routing rules
- • Use separate sheets for different extensions or purposes
Data Formatting Guidelines:
- • Phone numbers: Include country code (+1 for US/Canada)
- • Wildcards: Use `*` for pattern matching (e.g., `928*` for area codes)
- • Extensions: Use numeric values only
- • External numbers: Include full phone number with country code
Security Considerations:
- • Read-only access: Flowyte never modifies your sheets
- • Encrypted storage: All tokens are securely encrypted
- • Audit logging: Track all sync operations
- • Revoke access: Disconnect anytime from Integrations page
10.10 Troubleshooting Common Issues
Connection Problems:
- • Verify permissions - Ensure Google account has sheet access
- • Check sheet sharing - Make sure sheet is accessible
- • Refresh tokens - Disconnect and reconnect if needed
Sync Failures:
- • Column mapping - Verify all required columns are mapped
- • Data validation - Check for formatting errors in sheet
- • Sheet accessibility - Ensure sheet hasn't been moved or deleted
🎉 Integration Benefits
With Google Sheets integration configured, your routing rules will automatically stay in sync with your Google Sheets, providing a collaborative and efficient way to manage your call routing configuration. Team members can update routing rules directly in Google Sheets, and changes will be reflected in your call routing system based on your configured sync interval.
Congratulations!
You've successfully set up and configured your Flowyte visual call routing system. Your calls will now be intelligently routed based on your specific rules and conditions.
For additional assistance, please contact our support team at support@flowyte.com.